How To Build A Sawhorse Out Of 2x4s: Our Step-By-Step Tutorial
Contents
If you spend a lot of time working with wood, you know the cost of shop equipment adds up fast. One piece you can easily make yourself is a sawhorse built from 2×4s.
But if you’d rather buy a sawhorse and work on more interesting projects, check out our recommended sawhorses.
What Is a Sawhorse?
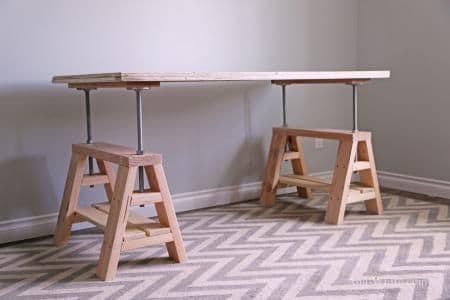
A sawhorse is a frame or trestle designed to hold wood of all shapes and sizes while cutting. It works best for sawing flat boards and 2×4s. You’ll usually need a pair, so plan to build at least two. They’re even good for practice for the less experienced woodworkers out there.
What Is a 2×4?
A 2×4 is named by its nominal size. Rough-sawn lumber once came close to 2 in. by 4 in., but a modern dried and planed 2×4 measures 1-1/2 by 3-1/2 in., per the USDA Wood Handbook’s lumber size table. You can buy them at any home center or lumberyard.
What Tools Do You Need?
The tools you require depend on whether you want to purchase your boards at the right length or cut them yourself. Home centers stock 2×4s in common lengths such as 8, 10 and 12 feet. Family Handyman’s version of this sawhorse uses two 12-ft. 2×4s and one 10-ft. 2×4. You might already have enough boards lying around.
For the average sawhorse, most people can use 32 in. 2×4’s. A taller person might have better length using 2×4’s closer to 42 in., especially if you are over 6 ft. tall. Besides the wood, you need 3 in. screws, an electric screwdriver or a drill, a framing square, and a saw to cut the boards to length. Wear safety glasses and hearing protection when cutting.
Build the I-Beam
The first step is to build the I-beam, the horizontal beam your workpieces rest on. If your boards are longer than 32 in., mark them at 32 in. and 64 in. and cut them to length.
Choose two boards for the top and bottom flanges of the I-beam. Mark a line 1 in. in from each long edge on both of them; the third board, the web, will sit centered between these lines. Lay one flange board flat on your bench.
Stand the web board on edge on top of it, centered between the lines. Place the other flange board flat on top. Drive 3 in. screws (or 16d nails, as Family Handyman’s plan allows) through each flange into the web every several inches. Screws hold better and let you take the sawhorse apart later.
Build the Legs
Once the I-beam is done, it’s time to work on the legs. Mark where you’ll attach the legs to the I-beam, usually 2 or 3 in. from each end. That leaves room to clamp materials at the ends. The legs themselves should be the exact same length as the I-beam, so make sure to either buy or cut enough 32 in. 2×4’s.
Final Installation
With the materials prepared, you can combine all of the pieces. Align a leg on its line, angled so the foot kicks out away from the beam. This splay gives the sawhorse the triangular stance it needs to stand on its own. Use a framing square to keep each leg square to the beam, as Family Handyman’s sawhorse plan recommends. You will need four 3 in. screws for each leg.
Once the leg and I-beam are in position, you can screw. Two screws should be driven up through the board of the leg into the upper flange. The other two should be driven straight through the leg and into the bottom flange. Repeat this step for every other leg, and your sawhorse will be able to stand.
If you want to add extra durability and stability to the sawhorse, you can use extra 2×4’s as rails. To do this, stand the sawhorse up. There should be two angled legs on each side. Take a 2×4 and screw it horizontally around the midpoint of the legs. Use another on the other side. This rail forms another triangle for extra protection, especially if you’re a carpenter who likes to work with heavier materials.
Conclusion
The nice thing about building your own sawhorse is that you can change the leg length or beam length to suit your height and the work you do. Plus, you get the satisfaction of another carpentry project completed by your own hands.
Again, if you’d rather buy a ready-made sawhorse and work on more interesting projects, do check out our recommended sawhorses.
What’s Next
If you would like more guides like this one, as well as tips and reviews, check out our homepage.
Sources
- How To Make Sawhorses (DIY), Family Handyman
- Wood Handbook, Chapter 6: Commercial Lumber, Round Timbers, and Ties, USDA Forest Products Laboratory