How to Use a Table Saw for Perfect Cuts
Contents
- How to Use a Table Saw Safely: The Must-Have Items
- A Table Saw
- Safety Gear
- The Workpieces
- Arbor Nut Wrench
- A Precision Tape Measure
- A Clamp
- How To Safely Use A Table Saw For Rip Cuts
- STEP 1: How to Set Up a Table Saw
- STEP 2: Position the Rip Fence on the Table
- STEP 3: Plug the Table Saw and Position the Material Ready for the Cut
- STEP 4: Guide the Workpiece along the Rip Fence
- STEP 5: Use a Push Stick to Drive the Workpiece when Finishing the Cut
- How To Use A Table Saw To Make Crosscuts
- STEP 1: Unplug the Table Saw and Adjust the Miter Gauge
- STEP 2: Position the Workpiece on the edge of the Miter Gauge and Plug the Table Saw
- STEP 3: Slide the Material and Miter Gauge Along the Blade
- Conclusion
- Sources
Most serious woodworkers eventually want a table saw. It makes fast, precise rip cuts and crosscuts.
If you just bought one, the starting point is learning how to use it safely and accurately. Here’s how to make the two basic cuts.
How to Use a Table Saw Safely: The Must-Have Items
To help you learn how to safely use a table saw, it is important to ensure you have the following items.
A Table Saw
Set your table saw on a flat, stable surface in a well-lit area with room to support long boards in front of and behind the blade. Read the owner’s manual before your first cut.
Safety Gear
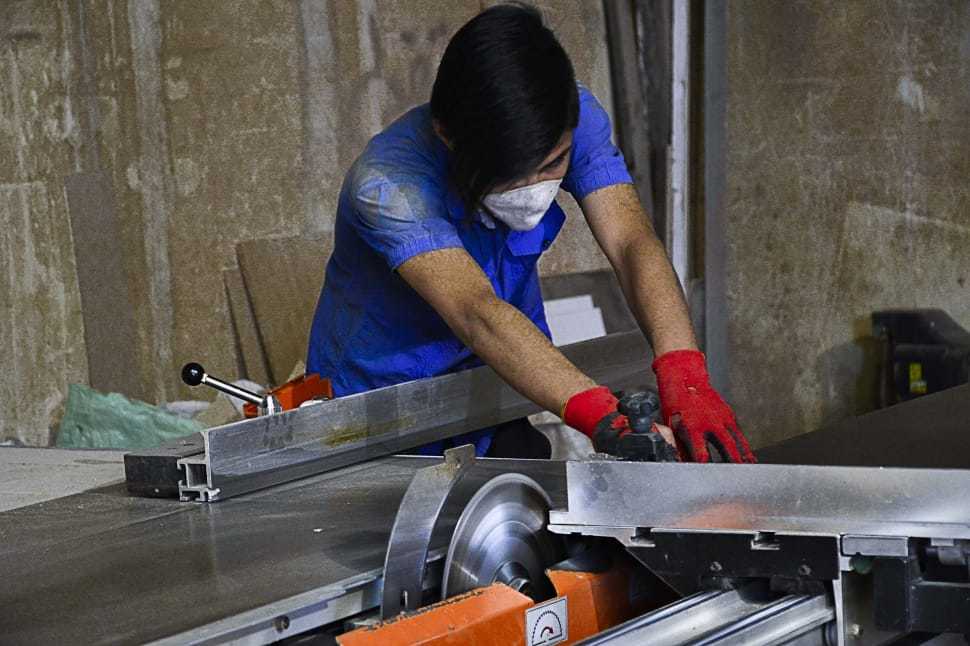
Table saws cause serious injuries, including amputations, so take every safety precaution.
Wear safety glasses (or a face shield) and hearing protection. Don’t wear gloves, loose sleeves or jewelry while cutting, since they can be pulled toward the blade. Keep the blade guard, riving knife (or spreader) and anti-kickback pawls installed whenever the cut allows.
The Workpieces
Have some scrap pieces for practicing rip cuts and crosscuts. You also need push sticks or push blocks to feed small and narrow pieces.
Arbor Nut Wrench
This wrench loosens and tightens the arbor nut when you change blades. Most table saws come with one.
A Precision Tape Measure
A tape measure or ruler helps you set the blade height and position the fence.
A Clamp
When making crosscuts, you can clamp the workpiece to the miter gauge so they move together through the blade.
How To Safely Use A Table Saw For Rip Cuts
Ripping a workpiece involves cutting it along the entire length, usually along the grain. A good example is cutting a board to a narrower width along its full length.
So, here are the steps to follow when using a table saw to make rip cuts:
STEP 1: How to Set Up a Table Saw
First, unplug the table saw and fit a rip blade (or a combination blade) on the machine’s arbor. Use the arbor nut wrench that came with your saw to loosen and tighten the arbor nut.
Install the blade so the teeth at the top face the front of the saw. The blade spins toward you, cutting downward into the wood.
Then set the blade height so the teeth rise about ¼ inch above the workpiece, as the Grizzly G0690 manual recommends. For example, for a 1/2-inch board, set the blade about ¾ inch above the tabletop. Make sure the riving knife and blade guard are in place.
STEP 2: Position the Rip Fence on the Table
Once the blade is set, position the rip fence. The fence guides the workpiece so the cut stays a uniform width. To move it, release the locking lever at the front.
Then, slide the fence so that its inner edge matches the desired width of the cut. Although you can use the table saw ruler that is located at the front when setting the fence, do not solely rely on it.
Using a tape measure, measure from the fence to the nearest tooth that is set toward the fence. The teeth alternate left and right, so measuring to the closest tooth accounts for the kerf the blade removes.
Lock the fence and make sure it’s parallel to the blade. A fence that pinches the board against the blade is a common cause of kickback.
STEP 3: Plug the Table Saw and Position the Material Ready for the Cut
Place the material on the table against the rip fence, with the end a few inches short of the blade. Turn on the saw and let it reach full speed before the wood touches the blade.
Stand slightly to the side of the blade, not directly behind it, so you’re out of the path of a kickback.
STEP 4: Guide the Workpiece along the Rip Fence
Feed the material steadily along the rip fence, keeping it flat on the table and tight against the fence. Keep your hands out of the line of the cut, and never reach over or behind the blade.
If the workpiece extends beyond the back of the table, use an outfeed table or roller stand for support. A helper should only support the board, not pull it.
Keep feeding until the board is completely past the blade. Never pull the workpiece backward through a running blade.
STEP 5: Use a Push Stick to Drive the Workpiece when Finishing the Cut
As you approach the end of the cut, switch to a push stick so your hands stay well away from the blade. OSHA recommends push sticks for small pieces and for pushing stock past the blade.
Always use a push stick or push block for narrow rips and small workpieces.
How To Use A Table Saw To Make Crosscuts
For crosscuts, move the rip fence out of the way. Never use the rip fence as a length stop while crosscutting with the miter gauge: the offcut can get trapped between the fence and blade and kick back.
To set the cutting length when making a crosscut, you should use a miter gauge, which has a fence to stabilize the workpiece and a bar that fits in one of the grooves on the table.
So, when the bar is fitted into the groove, the miter gauge will slide from the front to the back, allowing you to control the cut. The miter gauge also comes with a knob that allows you to set the angle of the cut.
Here are the main steps that you should follow to make a crosscut:
STEP 1: Unplug the Table Saw and Adjust the Miter Gauge
The first stage when using a table saw to make crosscuts is similar to that of making the rip cuts. So, start by unplugging the table saw and fitting the right blade for crosscuts.
Then, adjust the protractor guide on the miter gauge depending on whether you want to make straight crosscuts or angled (mitered) crosscuts.
STEP 2: Position the Workpiece on the edge of the Miter Gauge and Plug the Table Saw
Hold the workpiece firmly against the miter gauge fence, in front of the blade, and turn on the table saw. You can clamp the workpiece to the miter gauge for better control.
Don’t let the workpiece touch the blade until it reaches full speed.
STEP 3: Slide the Material and Miter Gauge Along the Blade
Carefully push the workpiece and the miter gauge through the spinning blade. Then turn off the table saw and wait for the blade to stop before removing the cutoff pieces.
Note: If the workpiece is long and extends beyond the table saw top, support it with a stand or extra bench. OSHA advises avoiding crosscuts of very long boards on a table saw, since they put your hands close to the blade; a miter saw or circular saw is safer for those.
A helper can support the far end of a wood workpiece, but should never pull it through the blade.
Conclusion
To use a table saw for rip cuts and crosscuts, measure carefully, use the right blade, keep the guard and riving knife in place, and hold the workpiece firmly against the fence or miter gauge.
Safety comes first with table saws. Your first few cuts may not be perfect, but they will improve with practice.
Our special thanks go to FineWoodworking for their video guide.
Sources
- Table Saws (Woodworking eTool), OSHA
- Model G0690/G0691 Owner's Manual, Grizzly Industrial