How To Use A Router Table As A Jointer: Our Top Tips For Success

Contents
A router table is one of the most versatile tools in a woodworking shop. It handles edge profiles, grooves, rabbets and pattern work.
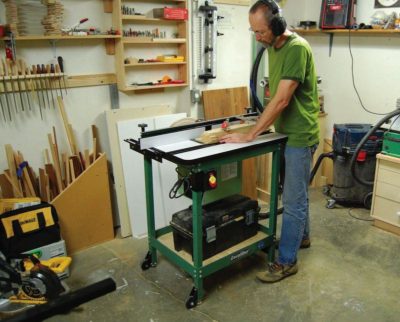
One thing many people don’t know a router table can do is act as a jointer. It works like a jointer laid on its side, and the setup is fairly simple.
It’s limited to edge jointing: as Rockler explains, a router table is too narrow for face jointing. But for straightening board edges before a glue-up, it does the job well.
Materials You Need
Aside from your router table, you need two things: a carbide straight bit and a split fence whose outfeed side can be offset. Choose a straight bit with a 1/2-inch shank for stiffness, and a cutting length at least as tall as your stock is thick. A shorter bit chatters less.
Rockler recommends a wide-diameter bit for the smoothest cut. Larger bits have a higher rim speed, so follow the bit maker’s maximum speed and turn the router speed down for big diameters.
A 1/2-inch-diameter upcut spiral bit is another good option, especially for stock less than an inch thick. Spiral bits cost more, but their shearing cut leaves a cleaner edge on difficult, highly figured grain. A standard straight bit is the cheaper alternative.
How to Modify Your Router Table
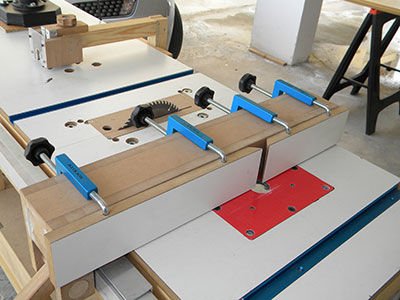
If your router table’s fence isn’t split, you can make a simple jointing fence. Clamp a straight fence to the table with the bit centered in its opening. Then attach a thin shim, such as a strip of plastic laminate or thin plywood, to the outfeed half with double-sided tape. The shim thickness sets your depth of cut; about 1/16 inch is plenty per pass.
How to Set Up Your Fence
With the router unplugged, hold a straightedge against the outfeed side of the fence. Move the fence until the outfeed face lines up exactly with the cutting edge of the bit at its farthest point; rotate the bit by hand to find it. The infeed side now sits back from the bit by the shim thickness, which is your depth of cut.
Make a test cut on scrap. If a gap opens between the board and the outfeed fence, the bit sticks out too far; if the board catches on the outfeed fence, it doesn’t stick out far enough. Snipe at the end of the board also means the outfeed fence needs realigning.
Tips in Preparing for the Jointing Process
When jointing two boards that will be glued edge to edge, mark the faces that will show. Joint one board with its marked face up and the other with its marked face down. If the bit isn’t perfectly square to the table, the two slightly angled edges mirror each other and still close into a flat panel.
Feed the board from right to left, against the bit’s rotation, keeping it pressed against the fence. Never feed left to right; that climb cut lets the bit grab and throw the workpiece. Use featherboards and push blocks to keep your hands away from the bit.
Make the Finishing Touches
Straight, smooth edges make tight glue joints, and the tighter the joint, the less visible the glue line. Keep practicing until your boards close with no gaps along their length.
Some Additional Safety Tips to keep in Mind
Unplug the router before changing bits or adjusting the fence. Always wear safety glasses and hearing protection when routing.
Use a combination square to check that the bit and fence are square to the table. Precision is key if you want smoother results.
Find a Good Router Table
Of course, you can’t have a good jointer if you don’t have a good router table, to begin with. You need to look for one with the flatter top. The surface of the table has to be rigid in order to create the most precise joints and to get the smoothest results. Even just small irregularities with the surface can lead to uneven surfaces, which can affect the jointing process.
Also make sure the insert plate is flat and stiff. It carries the router’s weight, so it shouldn’t sag. Make sure you get a router table with a base that is compatible with the router you already have. It is also important to have a stable base that do not wobble and can accommodate heavier loads.
Get the right accessories as well. A miter slot or T-slots let you lock featherboards in place, and T-slots in the fence also accept clamps and stops.
Conclusion
Turning your router table into an edge jointer is simple: offset the outfeed fence by your depth of cut, align it with the bit, and feed right to left with steady pressure.
Sources
- Using a Router Table as a Jointer?, Rockler
- Some Router Bits Need an Offset Fence, Fine Woodworking